Check-in & Registration
The Check-in / Registration page is where front-desk staff manage today’s registered medical records and check in patients with active appointments. From this single screen you can register walk-ins, edit appointments, run basic measurements, and call numbers to the LINE@ and TV queue display.
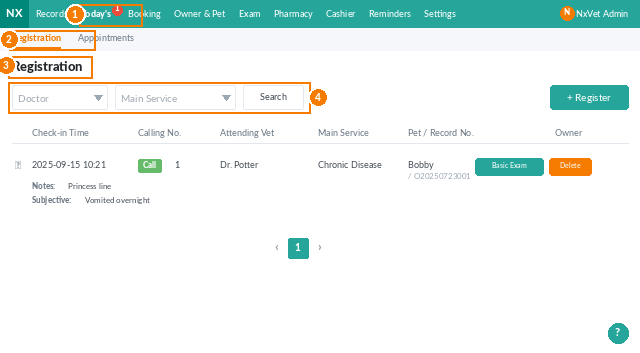
How to access
- From the main menu, click Today’s Consultations.
- Click Registration / Check-in.
- Switch between the Registration tab (walk-ins and registered records) and the Appointments tab (today’s pre-booked visits).
What you’ll see on the Registration tab
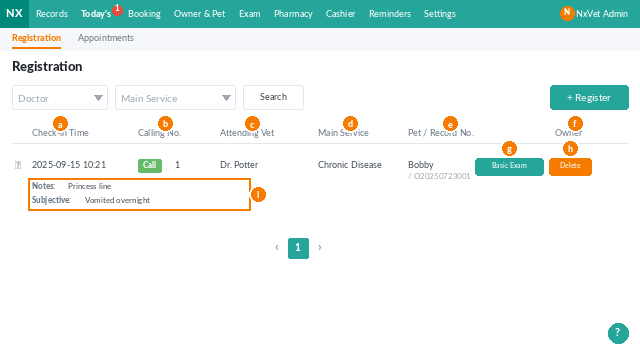
Each row in the registration list shows a patient who is in the clinic today:
- Check-in time — when the patient was checked in.
- Calling number — click Call to push the number live to LINE@ and the TV display.
- Attending vet — the doctor assigned to this visit.
- Main service — purpose of the visit (general outpatient, health check, surgery, etc.).
- Pet & medical record number — clickable link to the full record.
- Owner — pet owner’s name, also clickable.
- Basic measurements — open the form to capture or view vitals.
- Notes / subjective symptoms — expand the arrow to read what the owner reported.
Adding a new registration (walk-in)
- On the Registration tab, click Register.
- Search the owner by phone or name, or add a brand-new owner and pet.
- Pick a Main service and (optionally) an Attending vet.
- Choose how to finish the registration:
- Confirm — saves the registration; you can take measurements later.
- Confirm & Edit Basic Measurements — saves and jumps straight to the vitals form.
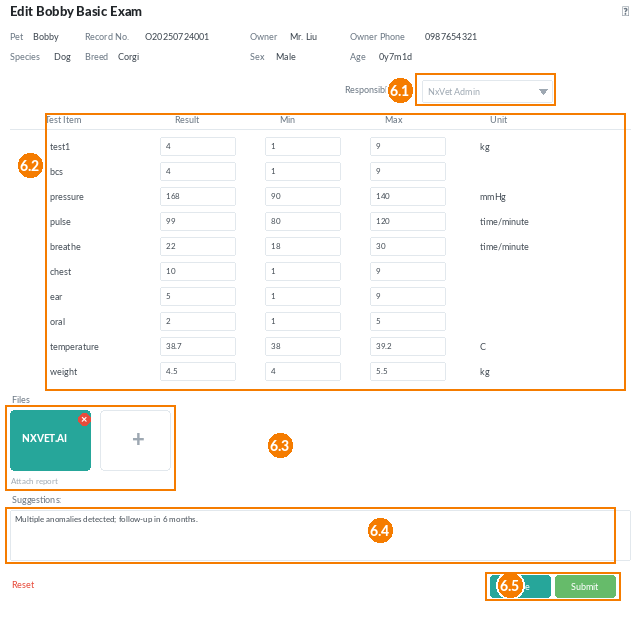
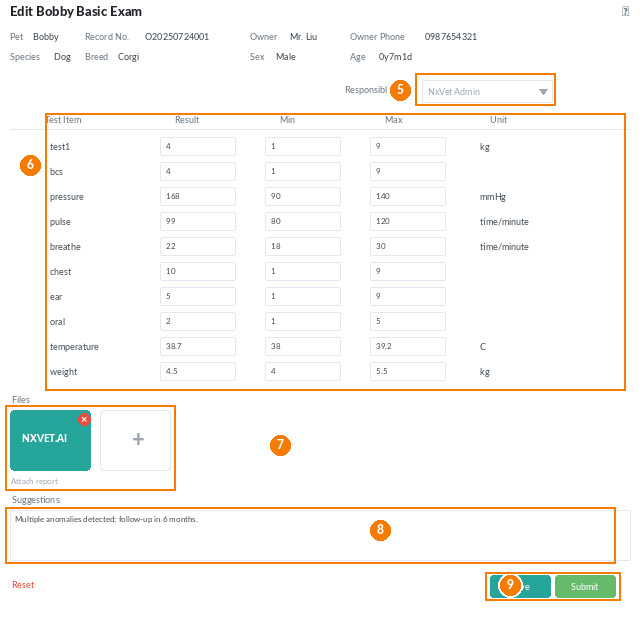
Recording basic measurements
- From the registration row, click Basic Measurements.
- Pick the Responsible personnel.
- Enter or accept values pushed from connected devices. You can always type over instrument values manually.
- Attach test reports or images, and write notes in Suggestions for the vet.
- Click Save to keep working, or Submit to push the values back into the patient’s medical record.
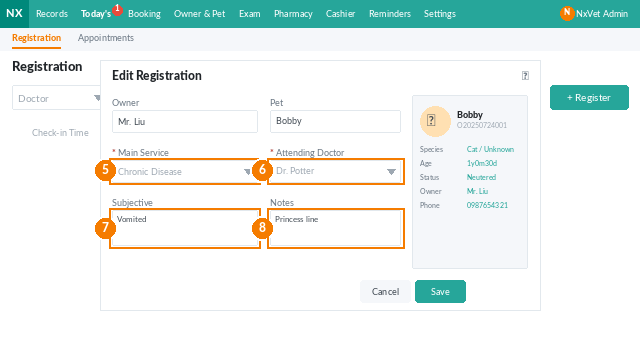
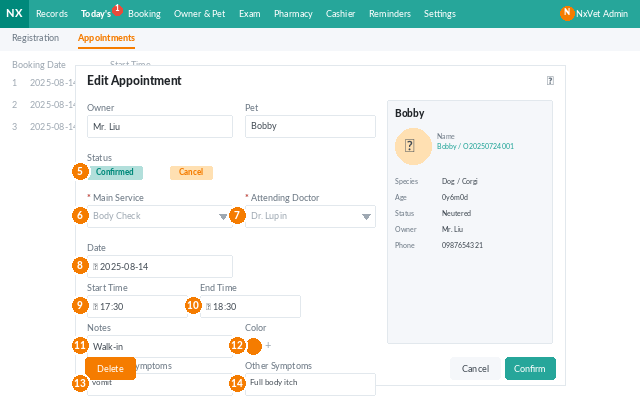
Editing or deleting a registration
- Edit — click any blank space in the patient row to open the edit form; you can change service, vet, subjective symptoms, and notes.
- Delete — click Delete on the right of the row.
Calling a number
- Click Call Number on the patient’s row.
- Pick the attending vet and consultation room.
- Click Confirm. The number syncs in real time to LINE@ and the TV display.
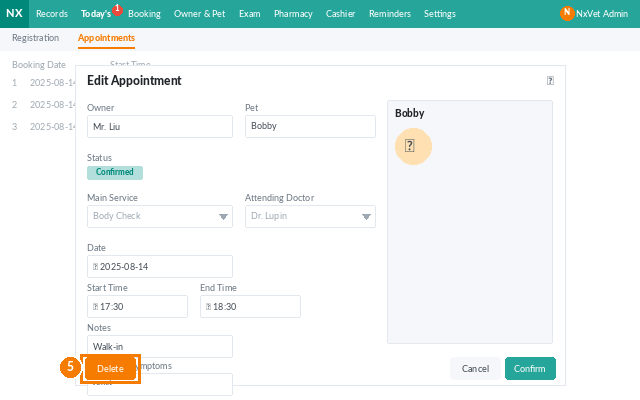
Managing today’s pre-booked appointments
Switch to the Appointments tab to see everyone who is scheduled today but has not yet checked in.
- View — appointment time, pet, attending vet, and consultation room.
- Edit — click any blank space in the row. You can flag the appointment as Confirmed (owner confirmed attendance) or Cancelled (with a note for the clinic record or blacklist).
- Delete — click the appointment, then click Delete.
- Check-in — click Check-in on the row when the owner arrives. The patient moves to the Registration tab and the overall medical record list.
Tip
If the owner cancels late, use the Cancel appointment note instead of deleting the row. It keeps the cancellation in the patient’s history and lets you flag repeat offenders without losing the record.